





















Introduction to Audio Interfaces and Digital Recording
An audio interface is the bridge between the analogue world and your computer: it converts signals from microphones and instruments into digital audio your software can record, and converts the digital audio back for your speakers and headphones. This lesson explains what actually matters when looking at interfaces (inputs, conversion quality, latency and connectivity) and then walks through setting up a complete home recording studio around one. When you are ready to choose a specific model, our Audio Interface Buying Guide compares current picks by budget; this lesson focuses on how it all works.

Choosing the Right Audio Interface
An audio interface is an essential tool in a digital recording setup, acting as the bridge between analogue audio signals from instruments and microphones and the digital world of computers and software. It converts analogue signals into digital ones for recording and vice versa for playback, allowing you to monitor your recordings through speakers or headphones. Choosing the right audio interface depends on your recording needs, setup, and budget.
Inputs and Outputs
The type and number of inputs and outputs on an audio interface are crucial considerations. Different recording setups demand different input types:
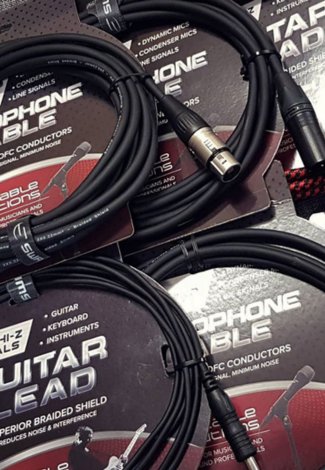
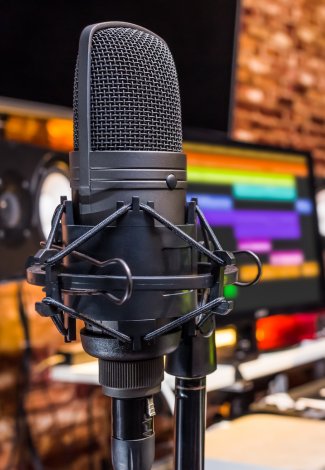
- XLR Inputs: Primarily for microphones, XLR inputs are necessary for capturing vocals and acoustic instruments. Look for an interface with enough XLR inputs if you plan on recording multiple microphones simultaneously, such as for a band setup or drum kit.
- 1/4 Inch (Instrument) Inputs: Commonly used for guitars, basses, and keyboards. Some interfaces offer "combo jacks" that accept both XLR and 1/4 inch connections, which can be helpful for flexibility.
- Digital Inputs: Interfaces with ADAT or S/PDIF digital inputs allow for expansion, enabling additional channels if you want to add more inputs later by connecting another device.
Consider the number of inputs you need based on your recording setup, whether you are a solo artist, podcaster, or working with a band. Many entry-level interfaces offer two inputs, which is often enough for solo recording or podcasting, while intermediate or professional setups may require four or more.
Digital Conversion Quality
The quality of an audio interface's analogue-to-digital and digital-to-analogue conversion impacts the clarity and depth of your recordings. Two key specifications to consider are:
- Sample Rate: The number of samples of audio captured per second. Common rates are 44.1kHz, 48kHz, and up to 192kHz. For most users, 24-bit/48kHz provides high-quality audio and is a good starting point. Advanced users may prefer higher sample rates.
- Bit Depth: Determines the dynamic range of your recordings. A 24-bit depth is standard for professional quality and provides a good balance between audio detail and file size.
For beginners, 24-bit/48kHz is more than sufficient. Higher-end interfaces may offer 24-bit/96kHz or even 192kHz for those looking for maximum quality, though these are typically necessary only in advanced or professional settings.
Latency and Monitoring
Latency is the delay between the time an audio signal enters the interface and the time it is heard through speakers or headphones. Low-latency monitoring is essential for musicians who want to use software effects while recording, as any noticeable delay can be distracting and hinder performance. Audio interfaces with direct monitoring options allow you to hear the sound without passing through the computer, reducing latency.
When choosing an interface, look for those that specify low-latency performance, especially if you plan to use real-time effects or monitor multiple tracks simultaneously. Having a dedicated headphone output on the interface is also helpful, allowing for real-time monitoring and minimising latency-related distractions.
Connectivity Options
The type of connection between the audio interface and computer can impact both performance and compatibility. Common connection types include:
- USB: The most widely used connection type, USB interfaces are popular across all levels, from entry-level to advanced. USB 2.0 is standard, while USB 3.0 and USB-C offer faster data transfer rates and improved stability, beneficial for handling multiple tracks and higher sample rates.
- Thunderbolt: Offers faster speeds and lower latency compared to USB. Thunderbolt is typically found in higher-end interfaces and is favoured by professionals for its stability and ability to handle high channel counts. However, it requires a compatible computer port and may be more expensive.
- Smartphone/Tablet Compatibility: Some audio interfaces are designed specifically for mobile devices, connecting via Lightning (iOS) or USB-C (Android). Not all interfaces can connect to mobile devices, so look for a model that specifically supports mobile recording if you plan to use a smartphone or tablet. These interfaces can be convenient for mobile recording but often have fewer input and output options.
When selecting an interface, ensure that it is compatible with your computer's connection type and consider the potential need for adaptors if you are working with different devices. USB remains a versatile choice, while Thunderbolt is ideal for users needing higher speed and stability.
Setting Up a Home Recording Studio
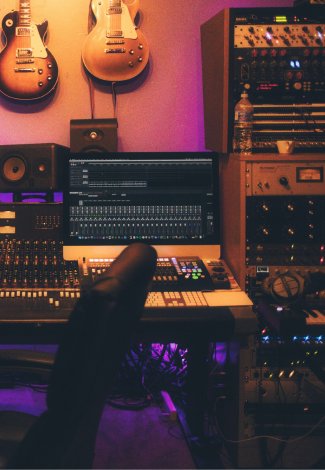
Setting up a home recording studio can seem daunting, but with the right components and a clear workflow, you can create a space to capture high-quality recordings and produce professional-grade audio. This guide will walk you through the essentials.
Basic Components of a Home Studio
Audio Interface
The audio interface serves as the hub of your recording setup. It connects microphones, instruments, and studio monitors to your computer, converting analogue signals into digital format for your DAW and vice versa. A few SWAMP-stocked examples show the spread:
- Budget all-in-one: The SWAMP SM11 3-channel mixer interface ([%product sku:'SM11'%][%param *body%]$[@price@][%/param%][%/product%]) combines a small mixer with USB recording, ideal for a first setup.
- Entry-level recording: The ICM MF-22 ([%product sku:'ICM-MF-22'%][%param *body%]$[@price@][%/param%][%/product%]) adds two Class A mic preamps at a beginner-friendly price.
- The popular standard: Two-channel interfaces like the Focusrite Scarlett Solo 4th Gen ([%product sku:'FOC-SCSOLO-GEN4'%][%param *body%]$[@price@][%/param%][%/product%]) are the default choice for solo recording.
- More inputs: For multi-track recording, step up to four-input models like the Focusrite Scarlett 4i4, or eight-preamp workhorses like the Tascam US-16x08 for tracking a band. Browse the full Audio Interfaces range to compare.
Monitors and Headphones
Studio monitors are designed to provide an accurate representation of your audio, unlike regular speakers, which often enhance certain frequencies. For precision:
- Use studio monitors for mixing and editing.
- Use closed-back studio headphones for recording to prevent audio bleed and open-back headphones for critical listening during mixing.
DAW (Digital Audio Workstation)
Your DAW is where recording, editing, and mixing happen. Popular options include:
- GarageBand: Beginner-friendly and free for Mac users.
- Ableton Live: Excellent for electronic music production and live performance.
- Pro Tools: The industry standard for professional audio production.
- Logic Pro: Ideal for intermediate to advanced users, exclusive to macOS.
Lesson 4 of this course covers what you will actually do inside the DAW; boxed licences are stocked in the DAW Software range.
Step-by-Step Setup Guide
Connecting the Interface
- Connect the audio interface to your computer using the appropriate cable (USB or Thunderbolt).
- Install the necessary drivers and software for your interface.
- Set the audio interface as the default input/output device in your computer's audio settings and DAW.
Configuring Input/Output Settings in the DAW
- Open your DAW and navigate to the audio settings menu.
- Select your interface as the audio input and output device.
- Assign inputs for each track to match your connected microphones or instruments.
- Set the output for monitoring through headphones or studio monitors.
Setting Up Monitors and Headphones
- Connect studio monitors to the interface using balanced cables (XLR or TRS).
- Plug headphones into the interface's headphone jack.
- Control monitoring volume directly from the interface to prevent sudden volume spikes.
Optimising Latency and Buffer Size
Latency can cause distracting delays during recording. Set a lower buffer size (e.g., 64-128 samples) for recording to reduce latency and increase the buffer size (e.g., 512-1024 samples) during mixing to allow smoother playback with multiple tracks and plugins.
Recording Essentials and Workflow
Recording Signal Flow
The signal flow begins with a microphone or instrument, which connects to the audio interface. The interface converts the analogue signal to digital, sending it to the DAW for recording. Monitoring happens through headphones or monitors connected to the interface. If that chain is fuzzy, revisit lesson 1 on signal flow.
Multi-Track Recording Basics
Multi-track recording allows you to record each instrument or vocal on a separate track in the DAW, providing more control during mixing. For instance:
- Record a drum kit with multiple microphones, assigning each to its track (e.g., kick, snare, toms).
- Layer tracks by recording vocals, guitars, and bass individually, giving you greater flexibility in mixing.
Basic DAW Features
- Track Setup: Create and label tracks for each input source.
- Recording: Arm tracks for recording and hit record to capture audio.
- Editing: Trim, fade, or adjust levels on individual clips.
- Playback: Listen to recordings and make adjustments as needed.
Upgrading and Expanding Your Setup
Adding More Inputs
Expand your interface's input capacity using ADAT or similar digital expansion options. Adding an 8-channel preamp with ADAT output can increase a 2-channel interface to 10 inputs.
MIDI and Virtual Instruments
MIDI controllers allow you to play virtual instruments within your DAW. MIDI interfaces expand connectivity for multiple MIDI devices, enabling control of software-based sounds. The final lesson of this course digs deeper into MIDI.
Acoustic Treatment Basics
Improving room acoustics enhances recording quality. Use foam panels or bass traps to minimise reflections and absorb low frequencies, and add diffusers to scatter sound waves and reduce echo. Browse the full Acoustic Treatment range.
Summary
Audio interfaces and home studio setups are at the heart of modern recording and production. From selecting the right interface to configuring a DAW and creating a functional recording environment, every detail plays a crucial role in achieving professional results. With the right combination of equipment, thoughtful setup, and a clear understanding of audio workflows, you can bring your creative visions to life. Whether you are recording music, podcasts, or voiceovers, mastering the fundamentals of audio interfaces and digital recording is the first step on your journey to audio excellence.
Shop audio interfaces at SWAMP
Ready to put this lesson into practice? Browse the full range of USB and mobile-ready recording interfaces in the SWAMP Audio Interfaces category, or compare current models by budget in the Audio Interface Buying Guide.
What an interface does, which specs matter, and building a home studio around one. Lesson 3 of the SWAMP audio production course.
This category is empty! Please try another category or use our search function to find what you are looking for. If you require further assistance please contact us.