How to String a Guitar
If you're just starting out playing the guitar, you obviously have an exciting road ahead of you. No one can say exactly where that road will go when you stick with your new instrument, but the one thing that is known is that the learning process is something that never stops. But sometimes the small things get lost in the excitement of a new adventure, and learning how to change the strings on your guitar can be one of them.
Guitars don't typically come with instructions on how to do this, and though it's a relatively simple process, it can take a little while to get the hang of doing it properly. Here, we've put together step-by-step instructions complete with photos to guide you through the process of changing strings for electric, acoustic and classical guitars.
Changing the Strings on an Electric Guitar
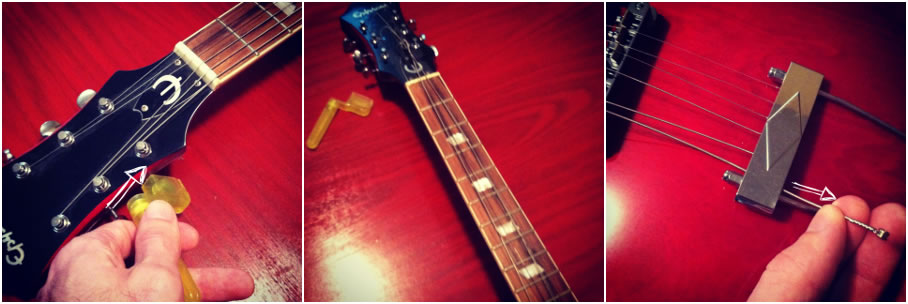
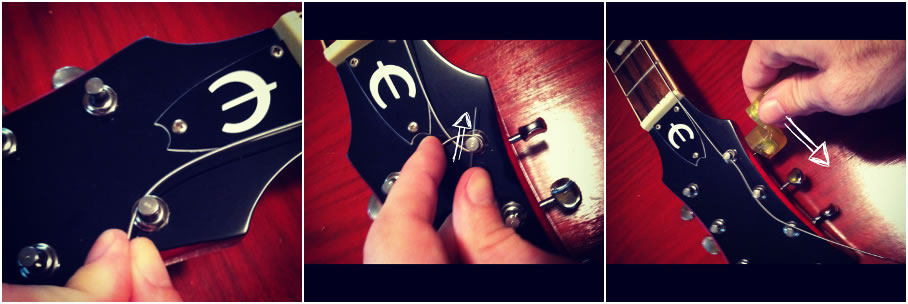
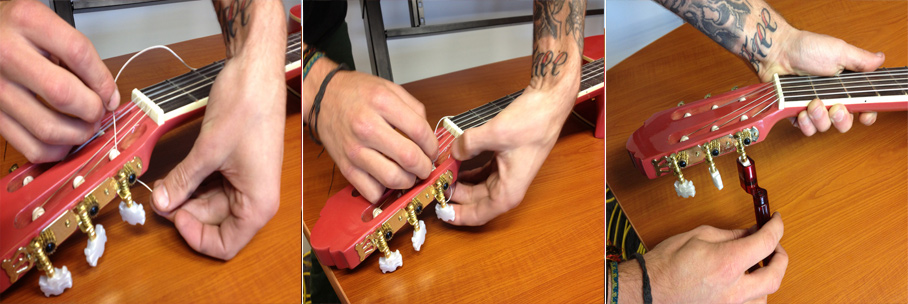
- Use a string winder to loosen your strings until you can remove them from the tuning pegs. If you don't have a string winder, no problem, you can turn the tuners by hand. But in the long run, the time a string winder will save you is worth the small investment.
- Once you've got all the strings removed from the headstock pegs, pull the now loosened string through the bridge to remove the string entirely. Though bridge setups vary widely from guitar to guitar, most electric guitars require you to pull the string through the bridge.
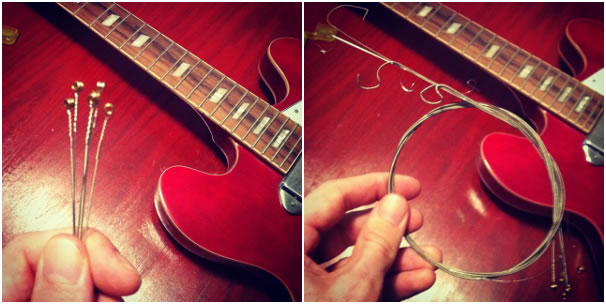
- Once you've removed all of the strings, they have a tendency to easily get misplaced around the room, which can lead to a painful surprise when you're walking barefoot.
- I like to group them all together and then wrap them around themselves in a loop like the second photo above to avoid this.
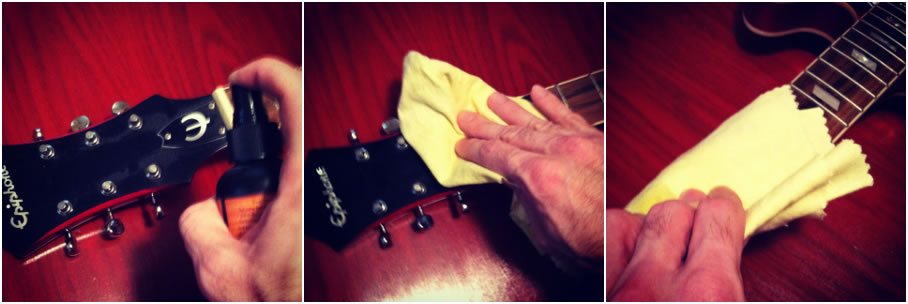
- Now that you have all the strings off, this is a great time to thoroughly clean the guitar. You'll be able to get the spots that you can't normally reach because the strings are in the way.
- Be sure to use a polish made specifically for guitars, and buff it out with a clean cloth. In the far right photo above, I have applied a couple drops of fret conditioner to the cloth to condition the wood of the fret board.
- The warning that the "String may unwind when removed" is not kidding. Be careful when removing the string from the packaging, and keep it away from your eyes before straightening it to put on the guitar
- Now it's time to actually put on the new strings. Start by pulling the string through the bridge (again, the exact method here will vary by guitar, but most function in just about the same way). Be sure that the string rests on the correct spot on the bridge, and then on the respective groove in the nut up by the headstock.
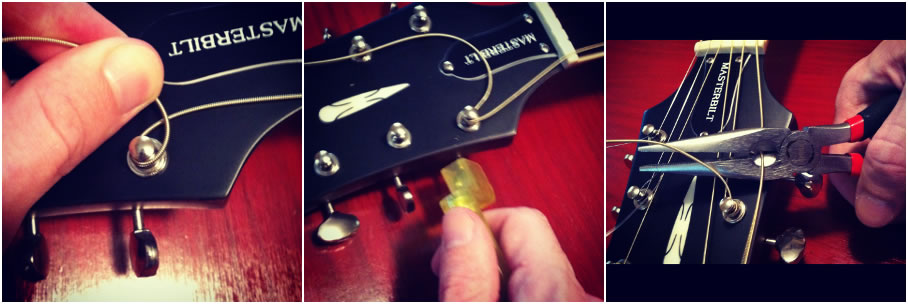
- Next, it's time to put the string on the peg. This is a spot where different guitarists use different methods, but I find it easiest to wrap the string around the tuning peg once and then pull it through the center hole.
- After that, pull the string through the hole as far as possible and then use the string winder again to tighten the string.
- Be sure not to tighten too much, you don't want to break a brand new string. Use a tuner to tighten the string to standard tuning.
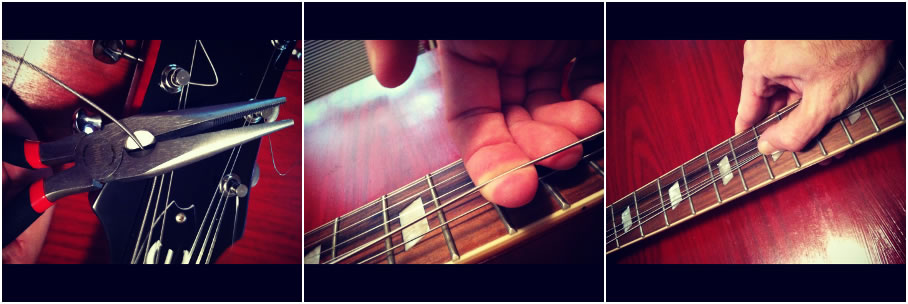 |
- At this point, you'll want to use wire cutters to cut off the excess portions of strings with wire cutters to avoid any pricks and excess noise.
- New strings will stretch when first put on a guitar, causing it to go out of tune. To help stretch the strings, pull them up away from the fretboard slightly, as you see in the middle photo. You can also bend the strings like the far right photo to stretch them.
- At this point, the strings will have stretched and the guitar will be out of tune again, so fire up the tuner and tune once again. You'll likely have to tune a few more times before the strings become completely stretched.
Changing the Strings on an Acoustic Guitar
Changing the strings on most steel string acoustic guitars is a very similar process to changing strings on electrics. The main difference is the type of bridge on most acoustics.First, you'll want to remove all strings from the machine heads, also referred to as tuning pegs, in the headstock using the same process detailed above for electric guitars.
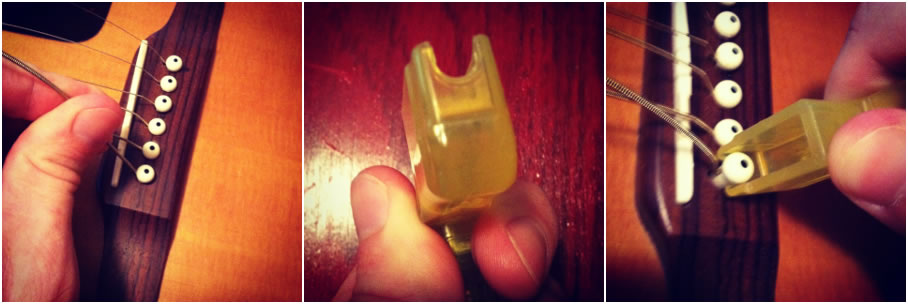 |
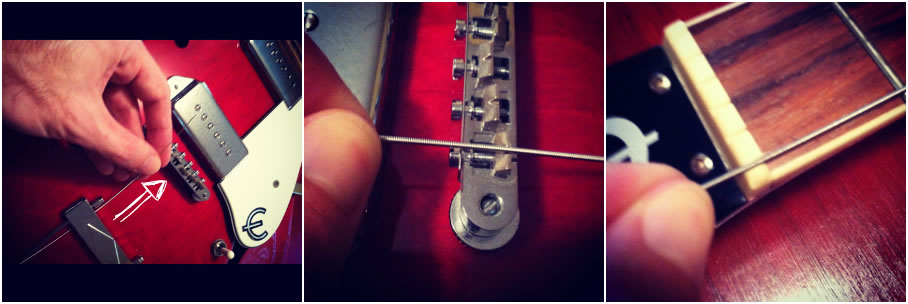
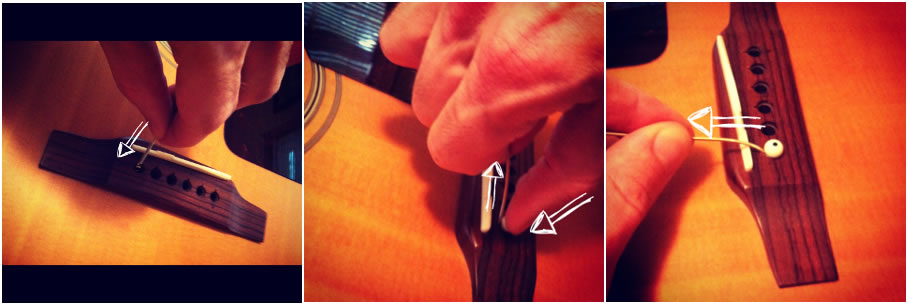
- Many acoustic guitars have bridges similar to the one above and use pegs, or bridge pins, to hold the strings in place.
- These can occasionally be somewhat difficult to remove , so it is easiest to push the existing string down slightly into the guitar if possible, as shown in the photo on the left.
- Most string winders come with a handy cut out which functions as a bridge pin remover. Use this cutout to pop the bridge pin out and then remove the string by pulling it out of the hole. If you don't have one, a pair of pliers can do the trick, but be sure not to squeeze too hard and damage or crush the pegs.
- After this, I recommend the same cleaning/polishing method used on the electric guitar as detailed above.
- When you're ready to install the new strings, push the string through the hole, and then insert peg. Push the peg down while pulling up on the string to hold it in place.
- When the string is secure, pull it across the bridge and up toward the headstock.
- The method for putting the string on the headstock of a steel string acoustic is the same as it is for electric guitars, which is detailed above. As you are tightening the strings, be cautious that the bridge pin doesn't pop out, as it can if it is not secure. If it begins to rise as you tighten the tuners, push it back in.
- Once you have the strings installed, follow the same instructions as the electric above and clip the excess with wire cutters and stretch the strings.
Changing the Strings on an Classical Guitar
The overall method of changing strings on a classical guitar is similar to that on electric and steel string acoustic guitars. The main difference is that the strings are tied at the bridge end. Because of this, it is often easier to cut the old strings with wire cutters than it is to remove them in once piece as detailed above. However, be sure to thoroughly loosen the strings before cutting them, as cutting a string with a large amount of tension in it can be very dangerous.
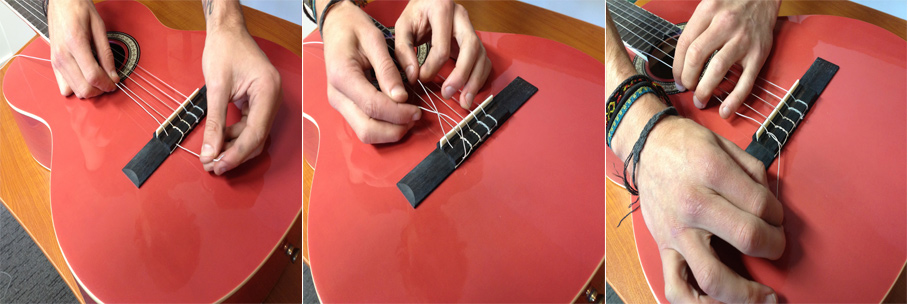
After removing the strings, it's time to learn the process of tying nylon strings.
- For the bass strings, thread the string first through the hole in the bridge, and then bring it up and loop it around and under itself. You'll then bring the end through the loop you've made to lock it in.
- For the two highest strings (B and High E in standard tuning), you'll want to twist the string under itself two or three times to make sure it is secure.
- Though the tuning pegs are within the headstock rather than protruding from it, the method to installing strings is similar to that of steel string and electric guitars.
- You'll first put the string through the hole in the machine head pin, and then twist the string around itself to make sure it is secure before you begin tightening the string.
Though restringing your guitar can initially seem intimidating, following the steps above will have a new set of strings on your guitar in no time, and each additional time you do it, the easier (and faster) it will be. As an added perk, they also will save you a trip to the music store to have the worker there put on your strings.